Showing posts with label applique. Show all posts

Thursday, 7 June 2012

It's here, it's here! My prize, MY NEW SEWING MACHINE!!

As regular readers will know, I have been sewing with my mum's machine that is as old as I am, so when I won a brand spanking new one, I couldn't quite believe it! It's almost like I wouldn't let myself believe it, I kept looking at the email and trying to work out if it might be a hoax!
Anyway, here it is in my workspace.
It's a Janome CXL310, RRP £299, kind of low-mid range, so very affordable and yet there's a lot to it, for the money. It has several practical stitches, including 6 (yes, 6!) different sorts of buttonhole, and 8 decorative stitches, 30 stitches in total. I won't bore you with a detailed spec as that can be found elsewhere, but I've already noticed some fab features I wanted to share with you.

Firstly, it has this fab little needle threader! I won't generally have a problem with threading my machine, but I know it's the bane of my mum's life, so this could be a real boon for some of you:
...and it retracts itself up out of the way when you're not using it:

Secondly, it has a handy button so that you can choose if you want the needle to stop in the up or down position, which is super for changing direction while you're sewing. It also has the capability to sew without the presser foot - you just press start and a away it goes, then stop, and it stops instantly. I haven't discovered what this could be used for yet (wandering off and making a martini?!) but I'm sure it will prove useful, and it's fascinating to watch! Plus for all us quilters, with our bulky projects - the foot has an extra 'up' position, so that you've got a little extra wiggle room for getting thicket projects under the foot. And, contrary to my previous machine, the seam guide on the base plate is accurate! I sewed a 1/4 seam without getting my tape measure out (and then got a tape measure out to double check!)

Stitch-wise there are a few things I want to mention. Firstly there's a stitch called the 'lock-a-matic' - sounds like something Wallace from Wallace & Grommit might invent! This is just a simple straight stitch, but it automatically does 4 reverse stitches at the start and end of your work - I think this will be my default stitch!

It also has this really handy function where you press a button and as it comes to a stop, the machine sews a few stitches on the spot to secure the end. This comes into it's own when using the fancy stitches - you can press this button half way through a fancy stitch and it merrily carries on until it gets to the end of the stitch, then stops! No more delicately trying to  time when you stop so that you get a complete shape!

Finally, I quickly spotted that it has an applique stitch. I had to try it straight away! I definitely need some practice, but I improved even while I did this one shape - no prizes for guessing which side I did first:
And the back:
I'm not really the type to sit and try out all the stitches, so I will let you know as I use it what the pros and cons are!

Wednesday, 15 February 2012

WIP Wednesday #1

Well this is my first 'WIP Wednesday'.
WIP Wednesday at Freshly Pieced

Completed projects
Since last Wednesday I have completed:
My 'quilt show' bag:

My bead bags for Beads of Courage (see linky on the right):

A pouch for my partner's portable hard drive, with accompanying tutorial:

Some travel tissue pouches:

Ongoing projects:
I am attampting to make a 'quilt as you go' quilt out of the remaining half of my Nicey Jane jelly roll. I thought 'quilt as you go' may be the solution to all my problems, as I *hate* machine quilting, largely because my machine is prehistoric...no really...it's this one:
but I digress.... anyway, I officially *hate* 'quilt as you go'!! The pieces keep warping, the ending squares aren't big enough...it's all gone horribly wrong :( I shall persevere, and just trim each square to 10in square instead of the 10.5in they are meant to be. But I shall state here for the record, I am not happy. NOT HAPPY. Anyway, here is my progress so far. Two squares. Too measly squares. And about an hour of unpicking. And they're not even the right size. Grrrrr

No progress:
My second ongoing project is this:
My mum bought me a 'Bali Pops' pack by Hoffman, to say well done for completing my first year on my return to teaching (bless her, she really is too good for me!). I believe this set is the sherbert colourway. We played with them for ages, and I decided that because the fabrics each had colours in common with other fabrics, they would work sort of like a colourwheel. So I looked for a pattern that would show this off and decided on a peace medallion. I think this will be really beautiful when finished, but I put it away last year at what must have been a critical stage, and now I am met with this and can't quite get my head round where to start:

I am also working on this:
I am slowly working my way through hand stitching the appliqued flowers. This lives in my handbag so I can get on with it whenever I get the chance! (gives self pat on back!)

'At the design stage':
(yes, this is a thinly veilled euphemism for 'not started yet', shush!)
Wandering around blogland is just *so* inspiring! So as a result of this I have various projects in mind to start this week:
1. A mini quilt for the modern mini challenge:
Modern Mini Challenge
2. A loo-roll cover for 'Dress up your roll' challenge (see linky to the right)
3. A heart garland to decorate my workspace, using this tutorial:
http://www.quiltstory.blogspot.com/2012/02/simply-charmed-blog-hop-valentines-tour.html
4. Dresses for 'Dress a girl around the world'
http://littlebiggirlstudio.blogspot.com/2009/02/pillowcase-dress-tutorial-dress-girl.html

This week's stats:
Completed projects - 4
Progress made - 1
No progress - 6

Also achieved today:
I have been a good girl and done housework before doing any sewing, yay me! This is a particular achievement as my partner has started his new job today, so a) I have no one to tell me to do the housework and b) I am going to have to start doing housework again, having eschewed it since my partner became unemployed (boooooo!!). So I have sorted out the spare room (which was a tip!), sorted out the piles of stuff that had accumulated in our bedroom, sorted out the pile of clothes in my wardrobe, packaged and addressed the various things that need posting later, rung the bank and claimed back some unfair charges, rung the council and claimed back an overpayment on my council tax and run a bath which I will go in once I've finished this post! Oooh, and worked out how to put buttons in my blog posts, yay! Quite a lot achieved, if I do say so myself!

Monday, 13 February 2012

Two projects finished!

I have had a pretty productive day, if I do say so myself!

Firstly I made 4 bags for the Beads of Courage Campaign (http://www.bechildcanceraware.org/beads-of-courage/). This is a really great cause and I'm so pleased I will be able to contribute in some little way. Here are my contributions:
The instructions to make these little bags are on the website, at the address above, and they are a doddle to make once you've done one. It takes 2 fat quarters and 54in of cord to make each one, so a great stash-buster, and a great cause, so I encourage you to go to the website, check it out and get involved.

Secondly, I have made my first foray into the world of tutorials! A couple of years ago when I bought my partner his portable hard-drive, I promised him I would make him a little pouch for it. In due course I bought the fabrics - he's a bit of a film buff, so I got a lovely set of four pieces of fabric (roughly fat eighths) on a movie theme: popcorn, ticket stubs, etc... which then languished in my stash until today. Naughty, naughty!
But today I have not only finally made him his little pouch, but made a tutorial for it. So here's the finished article:
...and if you'd like to make your own, just pootle along to my tutorial page to make your own!

And finally... MY PARTNER GOT A JOB!!! WHOOP!! After being unemployed since last September, which has been an enormous strain, he has finally got a new job, and he's really looking forward to starting on Wednesay (and I'm really looking forward to having him out of my hair so I can get onto some serious sewing!). So well done baby, I never lost faith in you! xx

Sunday, 12 February 2012

My inspiration, my mummy!

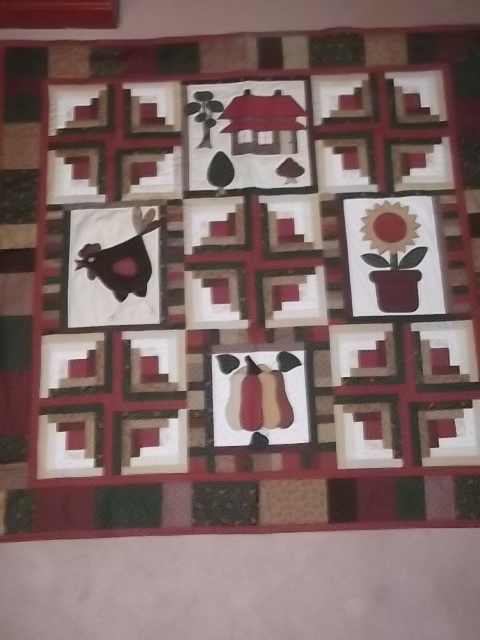
These beautiful quilts are just a small selection of those made by my mum. I will try to add more as and when she makes them, as she isn't a blogger herself and I really think she has a talent that needs sharing with a wider audience, clever lady!

So without further ado...


 And a close-up of the stitching on this one, she's so neat!
And my favourite:
And a close up of my favourite panel:

Friday, 10 February 2012

Quilts Two and Three

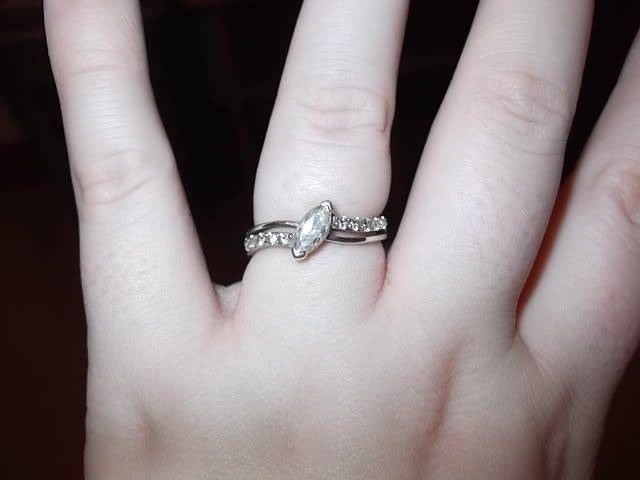
My second quilt will always have a special place in my heart, not just as I made it for my best friend's baby, my god-daughter to be, but also because I started properly working on it during our holiday in Ireland, where my partner and I got engaged. Here's the ring for those who are interested ;)
So anyway, the quilt! This quilt was inspired by my mum's style. She has only been quilting for a few years, but has such an eye for colour and design, she's got to the stage where I think even her teacher is in awe of her! So I designed my applique patches first, with several bunnies thrown in for good measure (I LOVE bunnies!!) and then designed the quilt around these. The fabric is a jelly roll of Oasis by Three Sisters for Moda: http://www.unitednotions.com/fcc_Oasis.pdf (I love love LOVE Moda fabrics... I have my eye on a jelly roll by 'Bunny Hill Designs for my next baby quilt, for obvious reasons!) Anyway, I am rambling, here's the quilt!
Excuse the wonky picture! In fact excuse the quality of my camera work generally - it's not my strong suite! Will try to work on it, specially for you ;)

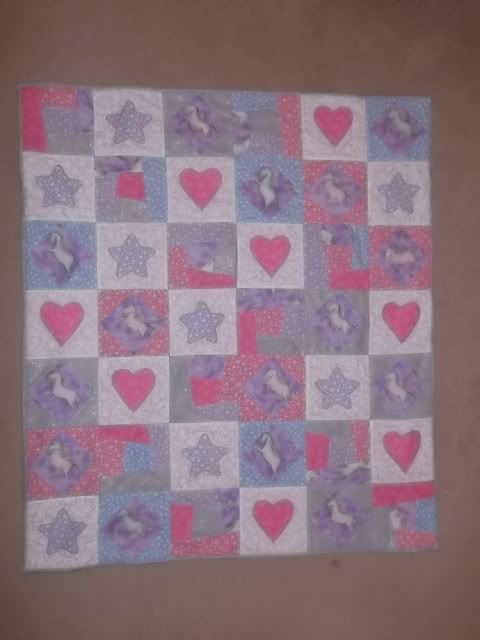
Then of course I 'had' to make a quilt for baby's sister (poor me!) I had just the fabrics - a set of glittery star and unicorm fabrics I had bought a few years earlier, originally planning to make myself a lap quilt. There was no real plan to this design. I cut out as many unicorns as I could first, then made the applique patches because I just love to sit and hand-applique in front of the TV in the evenings, and then I wanted a patchy square to showcase the fabrics for the remaining squares. I sewed them together, then backed with pink fleece, and Bob's your aunty's dentist's cat's vet's mother!